Saturday, December 21, 2013

...and a happy new year!

Hey there, Lindsay here, gosh, I've been so busy this holiday season that I haven't been by this blog much but I did have to pop in and share my Happy New Year's Tags using the Party Cats Stamps:

What!?! you are thinking, this chick has so much time on her hands that she is doing "New Years" before Christmas...well, not exactly, I did not make enough Christmas cards this year and it is too late to send out more Christmas cards so I went the New Years route. You can hear my tale of woe and learn how to make these beauties in today's video:

Well, I better boogie, I still have Christmas gifts to make...now where did I put that crochet hook? Happy crafting!


Thursday, December 12, 2013

Feast of Our lady Of Guadalupe


Hello Dear Lost Coaster's Friends:


Here Bibiana...
Today December 12th is celebrated throughout  the catholic world and specially in Mexico, the day of Our Lady of Guadalupe "Nuestra Señora de Guadalupe"...title given to the Virgin Mary.
And I decided to make this card in her honor using this stamp from  Lost Coast Designs  


The stamp is the reproduction of the original image of the virgin that is housed in the mayor Basilica of Our Lady of Guadalupe in Mexico, city and she is the patroness of Latin America!
The snowflakes were heat emboss using silver glitter over silver mirror paper and the gold rays were as well embossed with gold embossing powder. The main image and the roses were hand cut..

If you would like to know more about this religious day and feast head over MY BLOG, where I have a more extensive account.

another view...


OK my friends I hope you like the card, I love this image and I was very happy to be able to use it for this special day! to commemorate today her feast!

SUPPLIES: stamps from Lost Coast Designs: virgin of guadaluperoses; small snowflake set ;


Friday, November 1, 2013

Happy "Day of the Dead" or "Día de los Muertos"


Hello Lost Coaster's:

Here Bibiana...with a quick post, commemorating today this Mexican holiday: "Día de los Muertos" or "Day of the Dead" with these Mexican skull stamps by "Lost Coast Designs".


These stamps are reproductions of the famous drawings done by the Mexican artist José Guadalupe Posada depicting death and specially having created "la Catrina",


this elegant woman skull which was named later on "Catrina" by Diego Rivera  are the perfect stamps to showcase in  this "Triple Twisted Easel" card.

For complete details on this festivity with plenty of photos of this celebration and a VIDEO on how to make this type of card visit my blog.

Have a happy "Día de los Muertos!"


Monday, October 28, 2013

2 cool techniques, 1 spooky card!

Howdy folks, Lindsay here with a couple of fun technique videos for you so you can make this spooky card:

The first technique is what I call eroded stamping because the image looks grungy and deteriorating and the key to the technique is stamping with water, I used the bubble background from Lost Coast Designs. Have a look:

Then I dug out the square stamping gear I had to have but never use and my skeleton stamp from Lost Coast Designs. 

It was a fun card to make, I enjoyed using the stamping gear and will try to use it more often now:) Thanks for stopping by and til next time happy crafting!

Monday, October 14, 2013

Chalkboard technique with the Skull Flourish


Hello My Dear Stamper Friends:

Here Bibiana, with another post...
For quite some tome I wanted to showcase this trendy technique called "Chalkboard" and what a better way to do it with a stamp for Halloween!


I used here this nice red rubber stamp from "Lost Coast Designs", called the "Skull Flourish.

"The Chalkboard Technique" is quite simple but very pretty..it is basically an "emboss resist" technique but only made with white embossing powder and white ink on black cardstock!

You follow the same steps as for an "emboss resist" (heat emboss an image in white Embossing powder) and when cool you will "rub"/sponge over the top and in certain areas white ink,
some people add extra white elements with "Prismacolor" white pencils (or markers, chalks, "Pan Pastels" etc...), like "doodling" or making small designs (stripes, dots, shading etc) around the image...giving the illusion as if you where using a black board and chalks as it used to be in the school classrooms...


The background was stamped with the "Crackle Background" stamp in black over white cardstock, I added a "flourish" from "Spellbinders" and die cut the main panel with a "Spellbinders" label...added some "doodling" with silver "Stickles" and that's it...

Ok my dear friends, I hope you give it a try this fun "chalkboard" technique using some of this nice stamps from "Lost Coast Designs"!
We would like to hear from you so leave us a small comment and of course to all the people out there visiting the blog and reading it, thank you!

"Lost Coast Designs" stamps: "Skull Flourish"; "Crackle background"

Tuesday, October 8, 2013

A Murder of Crows!

Howdy folks, Lindsay here with a quick tag project for you using the Murder of Crows set from Lost coast Designs:


Watch the video to see how easy it is to make these. If you don't have the Pan Pastels I used you can use ink or chalk and a sponge.

To finish the tag I stamped the text by inking up half and stamping, then cleaning my stamp and stamping the rest on the other side of the bird. Easy Peasy! Thanks for stopping by and til next time happy crafting!

Sunday, September 15, 2013

Silhouette Girl with Bird...


Hello dear Stamper friends:

Here Bibiana, with another card...Today I would like to share this card that I made using this whimsical stamp from "Lost Coast Designs" called "The Silhouette Girl with Bird"; that you can find in their online catalog in the "Silhouette" section and that Linda put as an example ...


I decided to play this time with 3 different backgrounds and mix designs... using blues and some browns tones...
On the base piece, I stamped "the Tree branches background", I tear the edges, fold the corners and sponge the whole with blue ink to give more definition to this base.


I used 2 spellbinders labels.
The "label 20" from "Spellbinders" was inked using:
"the stamp resist" technique: which consists in stamping the "concentric circles" background stamp with white embossing powder, heat emboss and then sponging over it with "pumice", "weather wood" and some "walnut" distress inks over it creating a resist...


Do not be afraid to mix geometrical designs, just play with the colors and the shapes and you get an interesting piece, maybe not to the like of more "Simple and clean" looks but you have to play around and find your style ...Art is very subjective, so anything is good as long as You like it!...


BTW: For the people in Germany, specifically in Hagen (by Dortmund) pay a visit to Linda, from "Lost Coast Designs' booth. She is this week-end at the stamp convention "The Stempel Mecca" showcasing her stamps, so go and check them out, remember you only can get her stamps through these special events or through her online store... and maybe you get to see one or two  of my samples there at the booth...too :)

Ok my friends have a nice day! Remember, I love to read your comments that I appreciate enormously, taking into account how busy life is nowadays...Really from the bottom of my heart thanks!

Stamps used: Tree branches; Concentric circles; silhouette girl with bird;


Friday, August 30, 2013

DIY Pressed Flower Project!


Howdy friends, Lindsay here again with a fun project: Microwave pressed Flowers! First I want to show you a card made with the results featuring the dress-form stamp from Lost Coast Designs:


Don't neglect the inside of the card! I put a tine envelope I made with my 3"x3" kreate-a-lope inside so a note can be inserted and the card can be reused since there is no need to write in it!


OK, are you ready for some videos? I have 3! First off how to press flowers in your microwave. All you need is flowers, a sheet of paper, a paper towel and a glass or ceramic tile or a flat bottomed dish like a pie plate. Make sure whatever you use is flat with no ridges on it because it needs to press the flowers.

Wasn't that easy? Now grab your stamps, colored pencils, glue, cardstock and ink and let's make a card!

But wait, there's more! You will end up with single tiny flowers that you don't know what to do with, they are perfect for envelope seals, here's how to make them:

I hope I have inspired you to do some crafting this weekend and preserve some of those beautiful end of summer flowers before frost gets them. Thanks for stopping by and as always happy crafting!

Tuesday, August 27, 2013

Terrific Tag Techniques!

Hello Friends! Lindsay here again with another technique video, we will be making some wonderful tags using the Chess Pieces stamp set from Lost Coast Designs.


I'll also show you how I made the matching pocket card too. Here is a tip, first I made the envelope and used the leftover paper from my Kreate-a-lope to make the pocket on the card to hold the tag, no waste and it matched perfectly!

Here is the video to show you how it was done, mind you I filmed it late at night so I might not be as perky as usual:)

Pretty easy huh? Don't be afraid to try some of Lost Coast Designs unusual stamps, they can be the most fun, and as the video proves, easiest images to work with! Thanks for stopping by and til next time happy crafting!


Saturday, August 24, 2013

Get Those stamp Mounted!

Howdy friends! Lindsay here with a quick tip to keep your scissors from getting sticky when you mount stamps on cling cushion:

I can be a bit of a miser with my cling cushion and also be a bit lazy and wait until I have a ton of stamps to mount before I do it. Well I can trim them really closely, stick them to the foam and give it a dust of baby powder and just cut through the foam! It is a good tip if you don't have the KAI scissors too because you only have to cut one layer at a time. Thanks to Nancie Waterman for teaching me that trick. I hope you found it useful. Thanks for stopping by and til next time happy crafting!

Sunday, August 18, 2013

2 tags using the "Emboss Resist" technique!


Hello my Dear Friends:

Here Bibiana, ...Well today,  I 
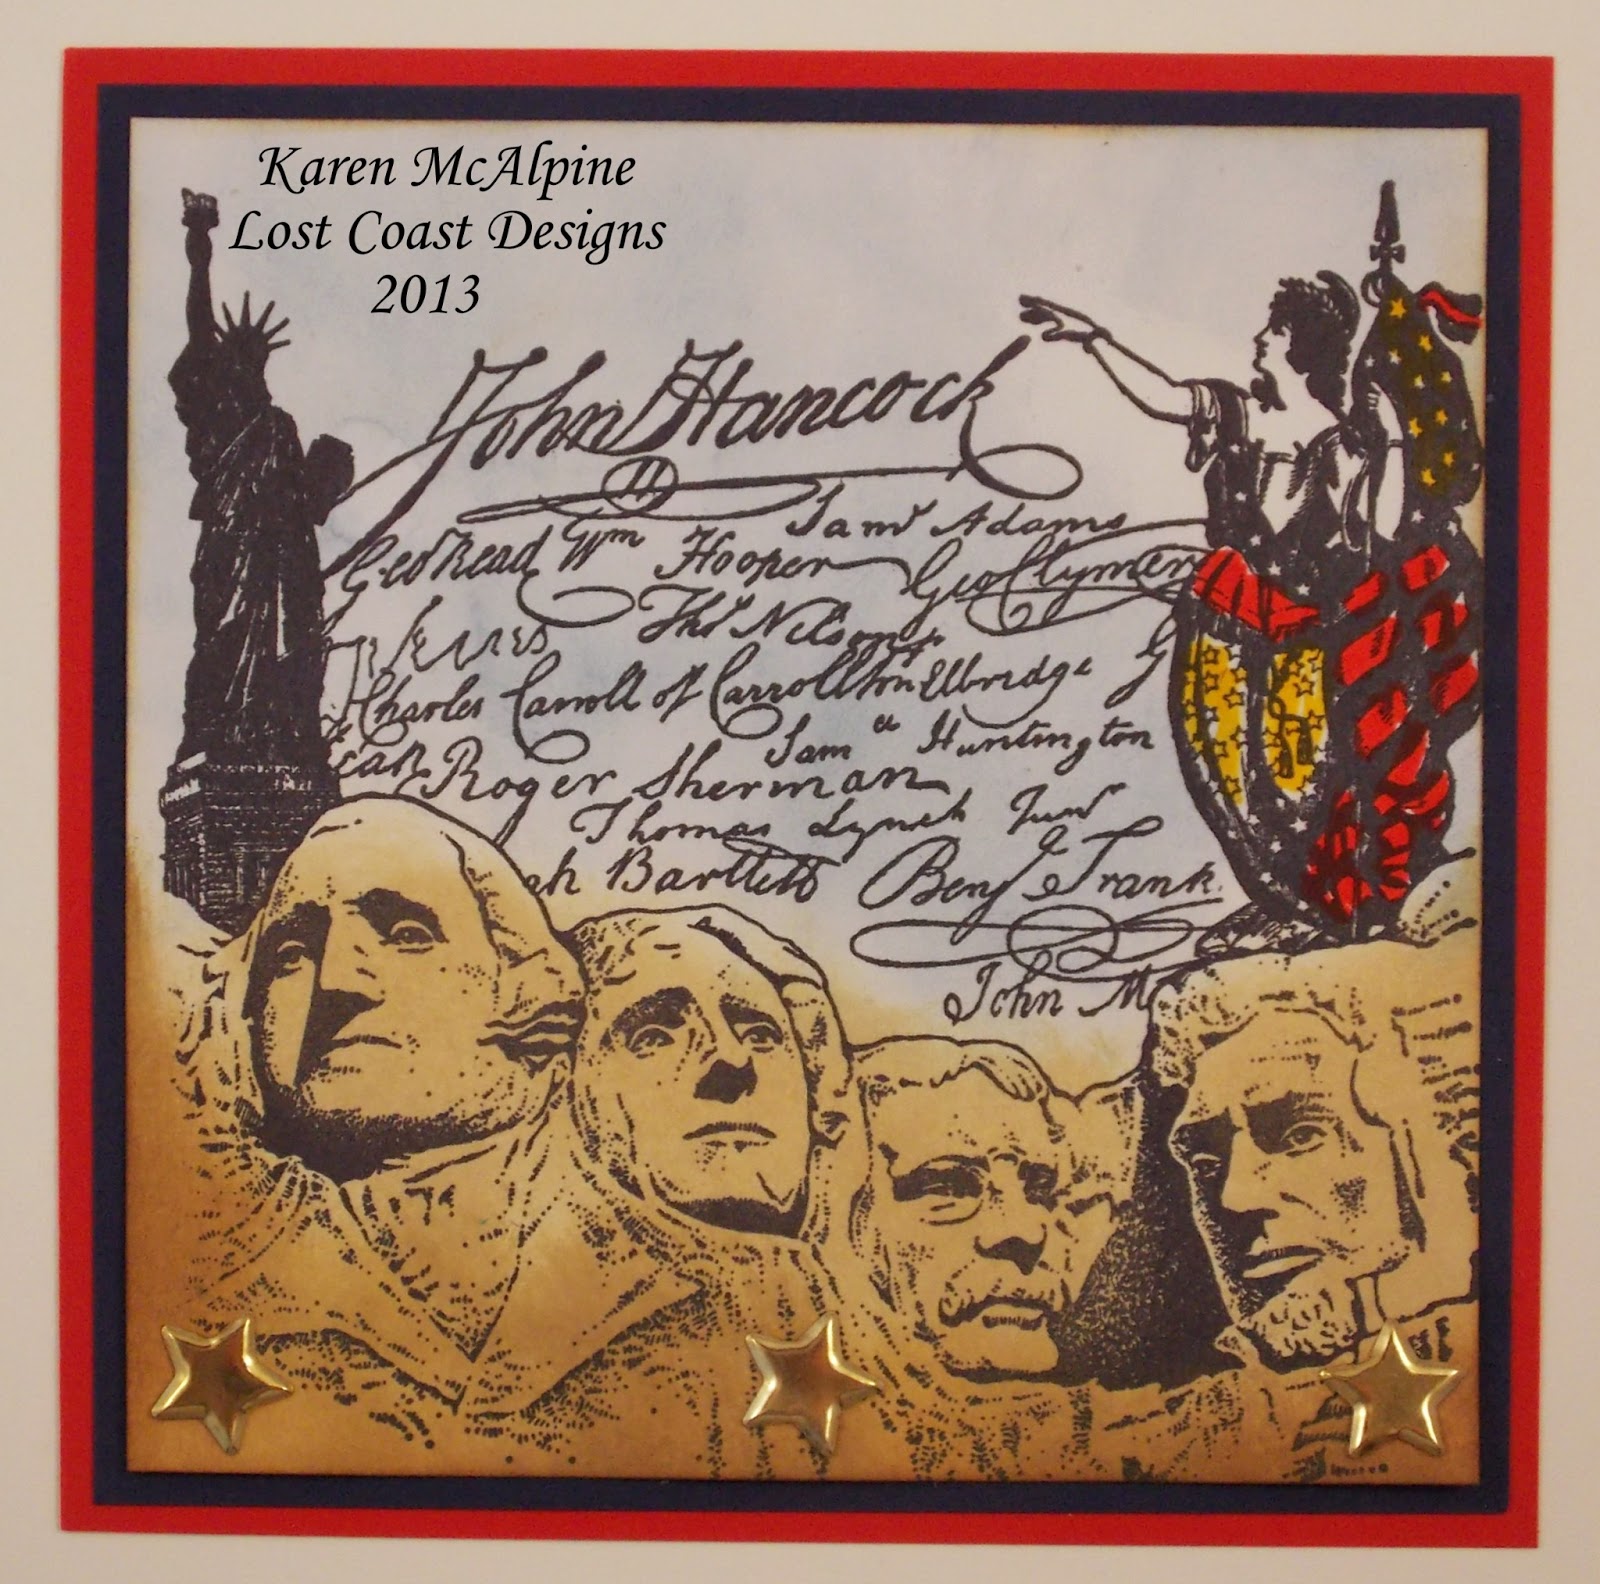
would like to share with you this project that I did using the beautiful stamps from "Lost Coast Designs"...not one but 2 cards!!...well, actually 2 tags...


They are very different from each other,  using several stamps but using the same technique in both tags: The technique of "Emboss Resist"...

This "Arch door window" tag is more vibrant in the colors and more masculine looking...
I love the "Swirl" stamp and "The arch window" is perfect as well for the people who like to make ATC's, actually I think I should do an ATC using this Arch!  it is so beautiful!
Noticed in both tags the ends or "heads"?
I tried to make them different...


In this one I stamped the crown twice for the back and for the front of the tag.
They were stamped in a same piece of paper, "facing" each other or one on top of the other if you prefer,  and connected by the top jewel, so when I  did cut them by hand the only place that is connected and not cut is at this point; the jewel and from there I inserted the ribbon then tied with twine...

The second one is more romantic and monochromatic in shades of green. (old paper and Iced spruce distress inks)
I used 2 stamps, one background the "chicken wire" which I think is very versatile; and the "Roses"
Look at the end point as well,  I simply attached the ribbon with a staple and folded a label in half and placed it on the top of the tag...


Emboss Resist Technique:
1- ink with versamark the image and stamp it in a cream card stock, (in this case the arch tag #1 and the rose in tag #2)
2- pour clear embossing powder over it, and heat emboss with your heat gun, let it cool
3- sponge various colors on different sections,
4- wipe your embossed imaged with a baby wipe to buff ink off your embossed image  and that's it...this is the "emboss resit" technique...because the embossed image "resist" the sponged inks...!
in tag # 1, I double heat emboss, (clear: arch and swirls: in gold) stamped over with other images, to add more depth and placed some dots with a "Copic" marker  around the tag and Voilà!

If you liked this images, make sure to stop by "Loast Coast Designs" LCD web page,  remember they only sell through online and if you are lucky you can see them at the stamp shows around the country...

Hope you have a nice day and thanks for stopping by...until our next Rendez-vous!

LCD stamps used here: 

Thursday, August 15, 2013

One Layer Rainbowy Goodness!

Howdy folks! Lindsay here with another fabulous one layer wonder using the Party Hat Cats stamps set from Lost Coast designs. This card is so quick and easy, you will need: stamps, stencils, dye ink pads, markers, masking tape, cardstock and a scrap of paper. Oh and remember the Roltap mini brayers I showed you how to make a couple weeks ago? We will use them too! Ready to get your craft on? Well, let's get to it!


Wasn't that easy? I hope you give it a try and let me know what you think! Happy crafting!

Sunday, August 4, 2013

Silhouette Witch using a DIY "Mini Roller Brayer" or "Roltap" tool


Hello Dear Stamper Friends:
Here Bibiana...
Well this whole post came to life thanks to Lindsay...she posted below (On Monday July 22nd) a card and a video on how to make a background card using the "Can Can Show Girls" stamp.

I discovered this "new" tool called "Roltap", thanks to the video that she posted here in this blog...

After seeing her video I had to have right away that tool, but unfortunately as she pointed out later in another video it turns out that this "new" tool, was an "oldie" and that it is a discontinued item:(

So following some of her suggestions, I ran to Michael's and made my own version.
I created my own "Mini Roller Brayer" Or "Roltap" tool...
here it is my take...
To view the complete tutorial on how to make this tool and see the new tool that I discovered that works like the "Roltap" visit my blog HERE ...


I decided to make a card, of course, using this new "mini brayer" or "Roltap" tool! and what better than a card for Halloween...

I used this fun "Silhouette Witch" stamp that "Lost Coast Designs" has in the Silhouette section of the their online catalogue  to make this fun background card in order to showcase how the "mini Roller Brayer" works...


I first did my background in 3 different color inks (black, gray: "London Fog: Memento ink"  and "Pumice: distress ink By Tim Holtz")...
If you prefer straight lines I guess you can use a ruler...but I do not mind the crooked lines... it goes fast, less that 3 min...and I think that's the charm of the background.
I die cut it with a "Spellbinders" label  3 die.


Then I stamped a 2nd panel using a large Background "Three Branches" stamp from "Lost Coast Designs" and I used a "leaf wheel" on the corners...just to use both "new" tools in my card.


 detail of the background...


I decided to make a gingham pattern and the broom has several layers to add some dimension...


Hope you will get inspired as I was, ...THANK YOU, Lindsay!

Thanks for stopping by and until next time,


Tuesday, July 30, 2013

Let's make a Circus Card (and dig out some old tools too!)

Howdy Friends!  There is nothing like cleaning the old craft room to remind you of all the forgotten favorites! I rekindled my love for crepe paper, stencils (it never really left) and moldable foam making this card:

It is a real cheap and easy card to make too! I used the Bubble Background and Circus Dogs stamps from Lost Coast Designs and it only took 15 minutes to make! Come stamp with me!


I hope that video urged YOU to dig out some old supplies and have a play! Thanks for stopping by and til next time happy crafting!

Monday, July 29, 2013

Red Gingham 50's Girl

Hello All,
Here is my second version of the new Lost Coast Designs stamp 50's Girl.  This time I used lots of red Gingham ribbon and added some Distress inks.


Other Lost Coast Design Stamps Used on this project: Rulers Background and Party Words.

Check out the full post on my blog Dreaming and Creating for more pics and instructions.  Have a great day!
Karen McAlpine

Turquoise and Pink 50's Girl

Hello Coasties!
Have you seen the new stamp from Lost Coast Designs --50's Girl?  It is really fun to work with.  I made two projects with the new stamp.  I will share the second project in a few days.  Today's card is in a very fifties color scheme--turquoise and pink.


I also used the following stamps on this projects: Circle Frame (in the background) and  the Party Words Set.

Check out all the materials and instructions for this sassy card on my blog, Dreaming and Creating.
Hope you are having a great day!  Soon you in a few days for the second project using 50's Girl.
Karen McAlpine

Wednesday, July 24, 2013

DIY Roltap tool! {let's make a mini brayer!}

Howdy friends! The other day I shared a project using a Colorbox Roltap mini brayer. Well, they are nearly impossible to find because they have been discontinued but have no fear, today I'll show you how to make your own:

Best of all you can make them for pennies and have one for each color of ink you like! Have fun and happy crafting!


Tuesday, July 23, 2013

"Kitty in a Garden Breeze" Winner of Perfect Tears Card Contest and live from CHA on Create & Craft TV!

Hello Friends!
I'm so excited to announce that this card of mine won the card category in Perfect Paper Craftings' Brand Ambassador Perfect Tears Contest and will be shown on their CHA TV segment live from Las Vegas on Create and Craft on Wednesday July 24!  Create and Craft is a UK crafting channel which you can watch on their website at Create and Craft TV.  


My card features two of Lost Coast Designs stamps:

Perfect Layers, Perfect Tears and Perfect Squares are the most awesome 'you can not live without' tools for scrapbookers and paper crafters!  For more info about Perfect Paper Craftings' products please visit my Ambassador page and use my special code Leigh5% at checkout to get 5% off your entire order :0)

More info about how I made my winning card will be up on my blog at Leigh SB Designs later this week so please stop by and check it out :0)

Leigh S-B
THE SHARPIE DOMINO QUEEN

Monday, July 22, 2013

Crafty Fun with Can-Can Girls!

Hello Friends! I had such a fun time in my studio today working with the Can-Can Girls stamp from Lost Coast Designs! I filmed a couple short tutorials for you. For the first one all you need is cardstock, scissors, a pencil and a ruler. A 45 degree angle is handy too if you have one, if not take a paper square and cut it from corner to corner and you are in business! Let's make a lattice edge card:


Well, that was easy huh? I got rummaging around, as I often do, in my studio drawers and came across a tool I got years ago called a Roltap. It is like a tiny sponge brayer and I used it to do some nifty techniques, watch as I finish this card! I also dusted off the color dusters, stencil brushes and chalk!


So, then I got to thinking, I wonder if Colorbox still makes Roltaps because now I see how cool it is I want more so I have one head for each color family. No such luck, I guess I'll have to come up with a frugal replacement...I'll keep you posted! That's it for me. If you have any questions on anything I posted today feel free to leave a comment, thanks for stopping by and til next time happy crafting!

Monday, July 15, 2013

Steampunk Balloons or Montgolfières!


Hello Dear Stamper Friends:

HERE BIBIANA!...
Today I would like to share these 2 cards that I made using the same "Lost Coast Designs" stamp but but with two different looks......"The Steampunk Balloons Guys" stamp!


This first card was stamped on glossy paper. Sponged with inks and then all the stamps were inked with various colors of Archival inks, a technique that I leanrt from Tim Holtz (of course!)...the effect is quite nice...


The balloons/Montgolfières, (as they are also known), are so "French" !! This image is a vintage reproduction!...
The stamp on the corner in pink ink is a somewhat reproduction of the ID card for French citizens...that is how they used to look, more or less!


CURIOUS NOTE: did you know that the "Montgolfière - style/hot air balloon" was invented by 2 French Brothers "The Montgolfière's", back in the 18th century? This stamp here (only the balloon)  is the "exact" reproduction of that first model that the brothers flew at "Versailles" in front of the King Louis the XVI and Marie Antoinette!!! and since then the hot air balloons are also know as "Montgolfières" in honor of their inventors!

In this second card, The sentiment/banner is so appropriate..it is as well a "reproduction" of what you might find in the "old" prints on the back of the French/Canadian old postcards...


The background was first sponged with inks, then dry embossed, add gold embossing powder and last sponged more on the top with black ink ...all these steps to create this "patina" look!


If you are into French stuff, into vintage and old reproductions these stamps are for you then...I really like them and that is why I use them...they "mean" something to me, specially, teaching French and  living so many years over there ... I have always said that my "soul" belongs  to France!
and anyways I found them pretty and this particular one is perfect for cards for men!

I really encourage you to have a pick at the online catalogue!

Ok hope you have a lovely day and keep on stamping! bye for now...

SUPPLIES:
Stamps used: Steampunk balloon guys , travel stuff set (for the ID stamp), Pencils background, Concentric cicles;

Saturday, July 13, 2013

Dreamy Framed Cosmos Collage

Hi Coasties!
I have been stamping again and made another card with the Cosmos Collage Stamp.  For this card, I added some die cut frames and pretty DP.  The image is stamped with Black Archival ink on blue CS.


For more pics and instructions, click over to my blog, Dreaming and Creating.  Hope you are having a great weekend.
Karen McAlpine

Sunday, June 30, 2013

America Collage - Fourth of July Card

Hi Everyone!
I thought I would pop in and share a Fourth of July card I made using the Lost Coast Design Stamp, America Collage.  This  card went together fairly quickly, so I made five of them.  I sent out four to friends and family.  I stamped the image on white CS with Jet Black Archival ink.


The coloring was done with Distress inks.  For more info and pics, click over to my blog, Dreaming and Creating.  Hope you are having a great weekend!!
Karen McAlpine

Thursday, June 27, 2013

Lavender Blue Cosmos Collage

Hi Coasties!
Karen here today with the second card in my series made with the Lost Coast Design stamp, Cosmos Collage (one of my favorites!).    I made three projects using this stamp and will share the third later this week.  The color scheme this time is lavender and blue---very dreamy.  Take a look.


Die cut keys, fabric, and distress inks were used to complete the card.  For more pics and info, click over to my blog, Dreaming and Creating.  Hope you are having a great day!
Karen McAlpine